How to Install eSIM
Before you install
Check your exact model and country variant in the compatibility guide. Support varies by model and region; do not assume every iPhone sold in mainland China, Hong Kong or Macao has the same capabilities.
Connect to stable Wi-Fi. For an iPhone using a different carrier, check Settings → General → About → Carrier Lock for “No SIM restrictions”. Contact the original carrier if the phone is locked.
Method 1: Scan QR Code
For iPhone:
Alternatively, you can use the Camera app to scan the QR code.
For Samsung:
For Pixel:
Method 2: Enter Activation Code Manually
Open My eSIMs, select your plan and open Details. The installation section shows separate SM-DP+ Address and Activation Code fields for iPhone, and a combined activation string for Android. Copy the values exactly, without extra spaces.
For iPhone:
For Samsung:
For Pixel:
Android menu names vary by device and system version. If manual installation is missing or an error appears, check compatibility and follow the installation troubleshooting steps; a missing menu alone does not establish that the device is incompatible.
Recommendations
- Turn off Data Roaming on your Primary line (home SIM card) to prevent data roaming charges.
- If you install the eSIM before you arrive in your destination, be sure to set the eSIM to your primary Cellular / Mobile Data plan when you arrive.
- IMPORTANT: Turn on Low Data Mode (iPhone) or Data Saver mode (Android) to prevent background data while using your eSIM.
Example (iPhone)
Below are the correct steps and settings to install the eSIM on your iPhone.
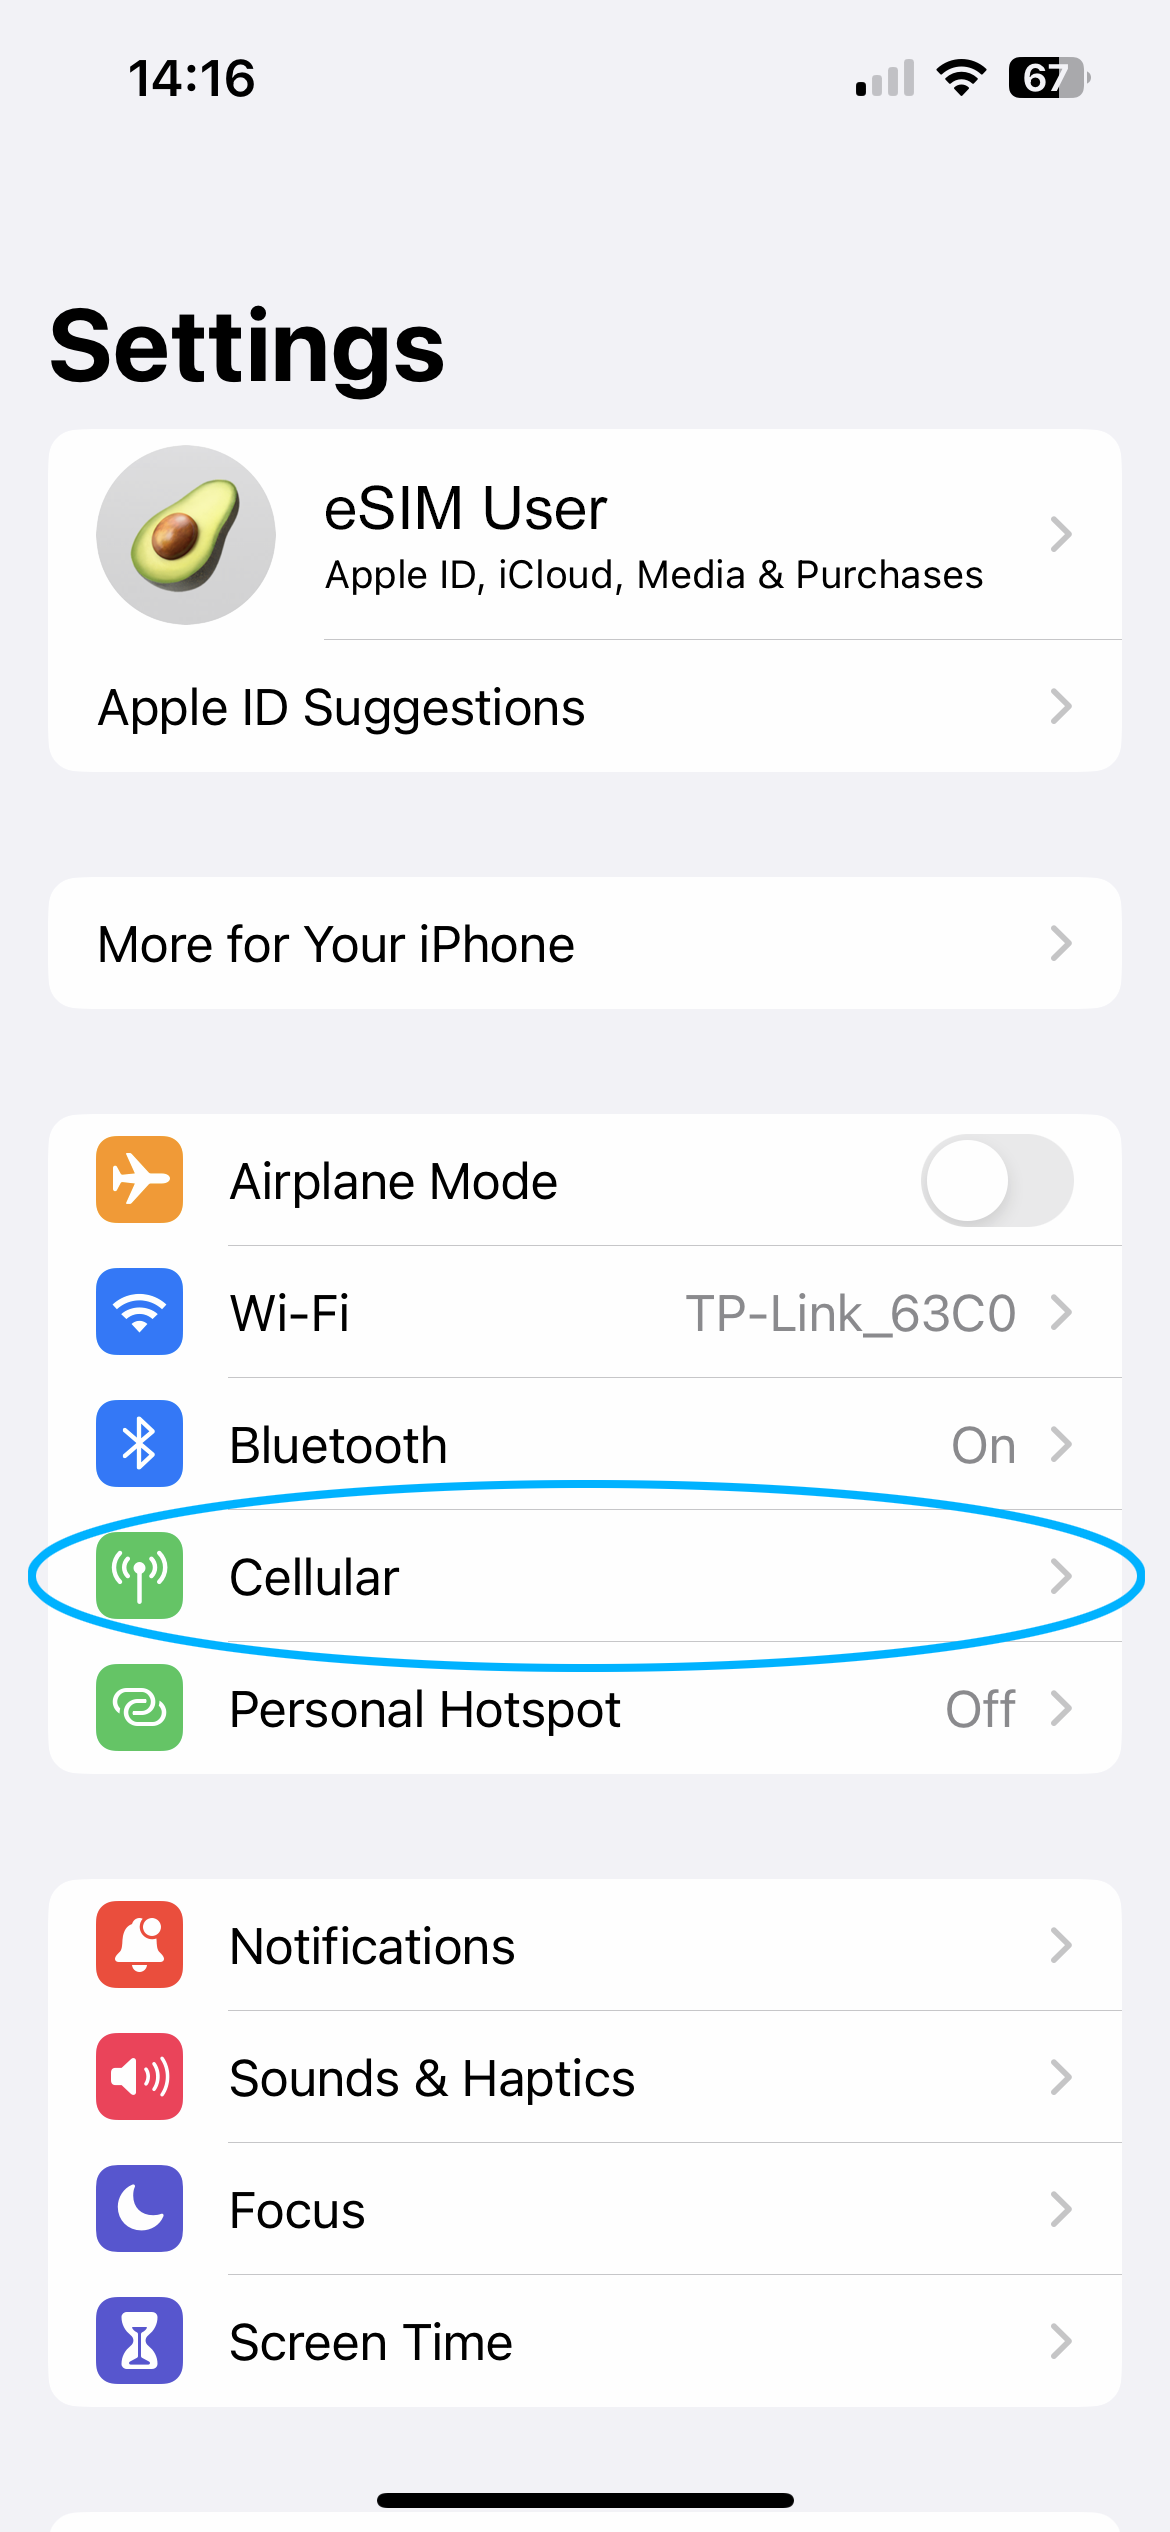
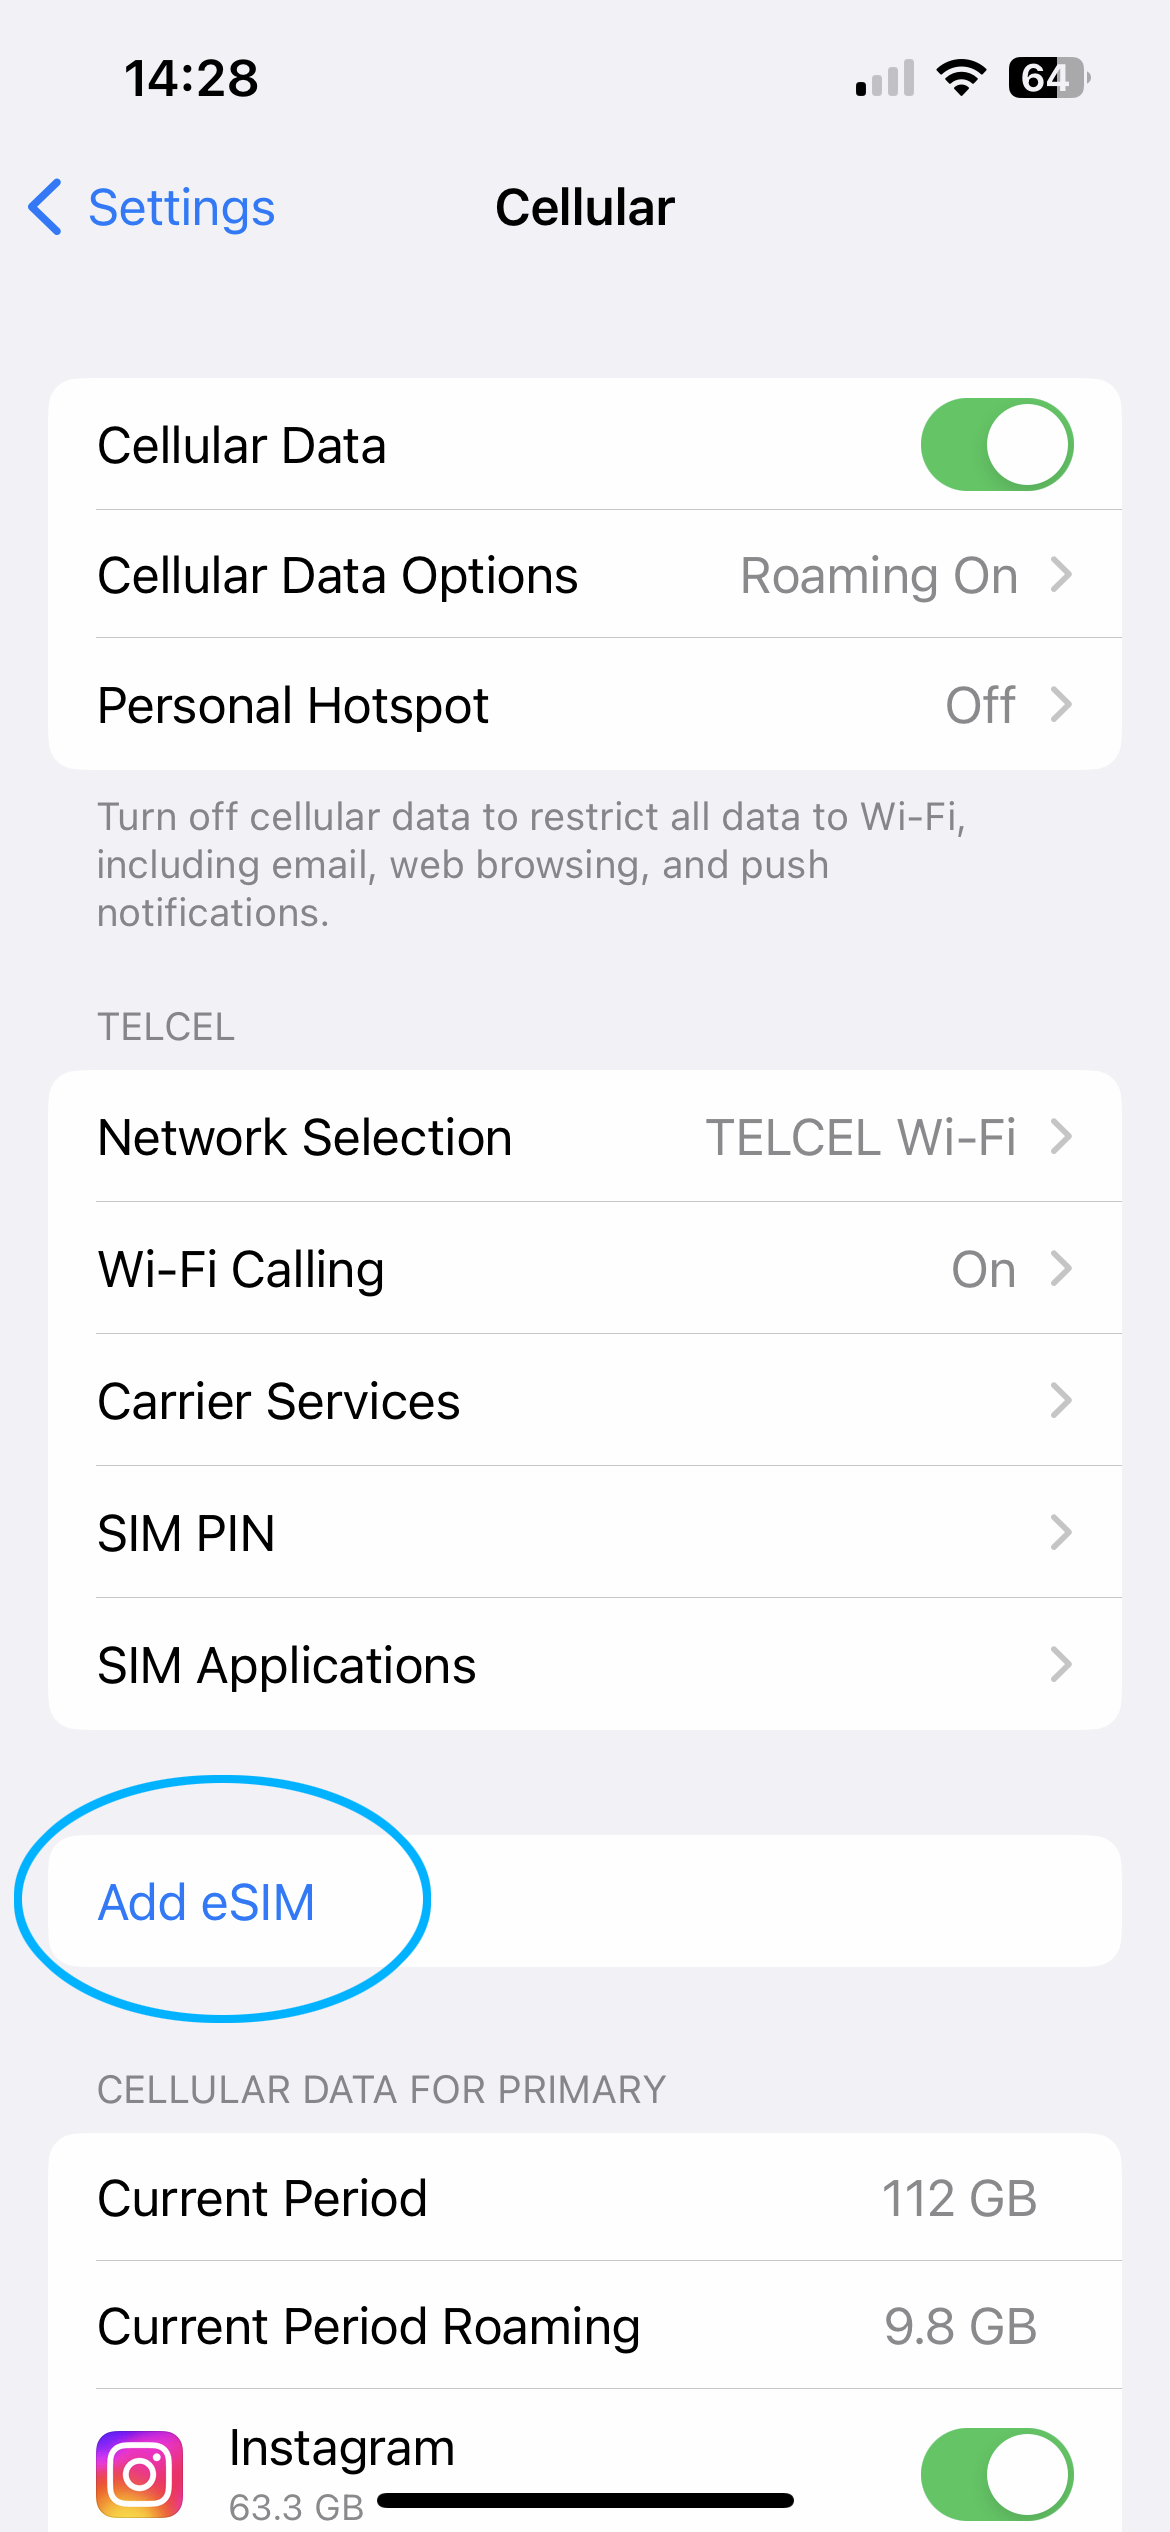
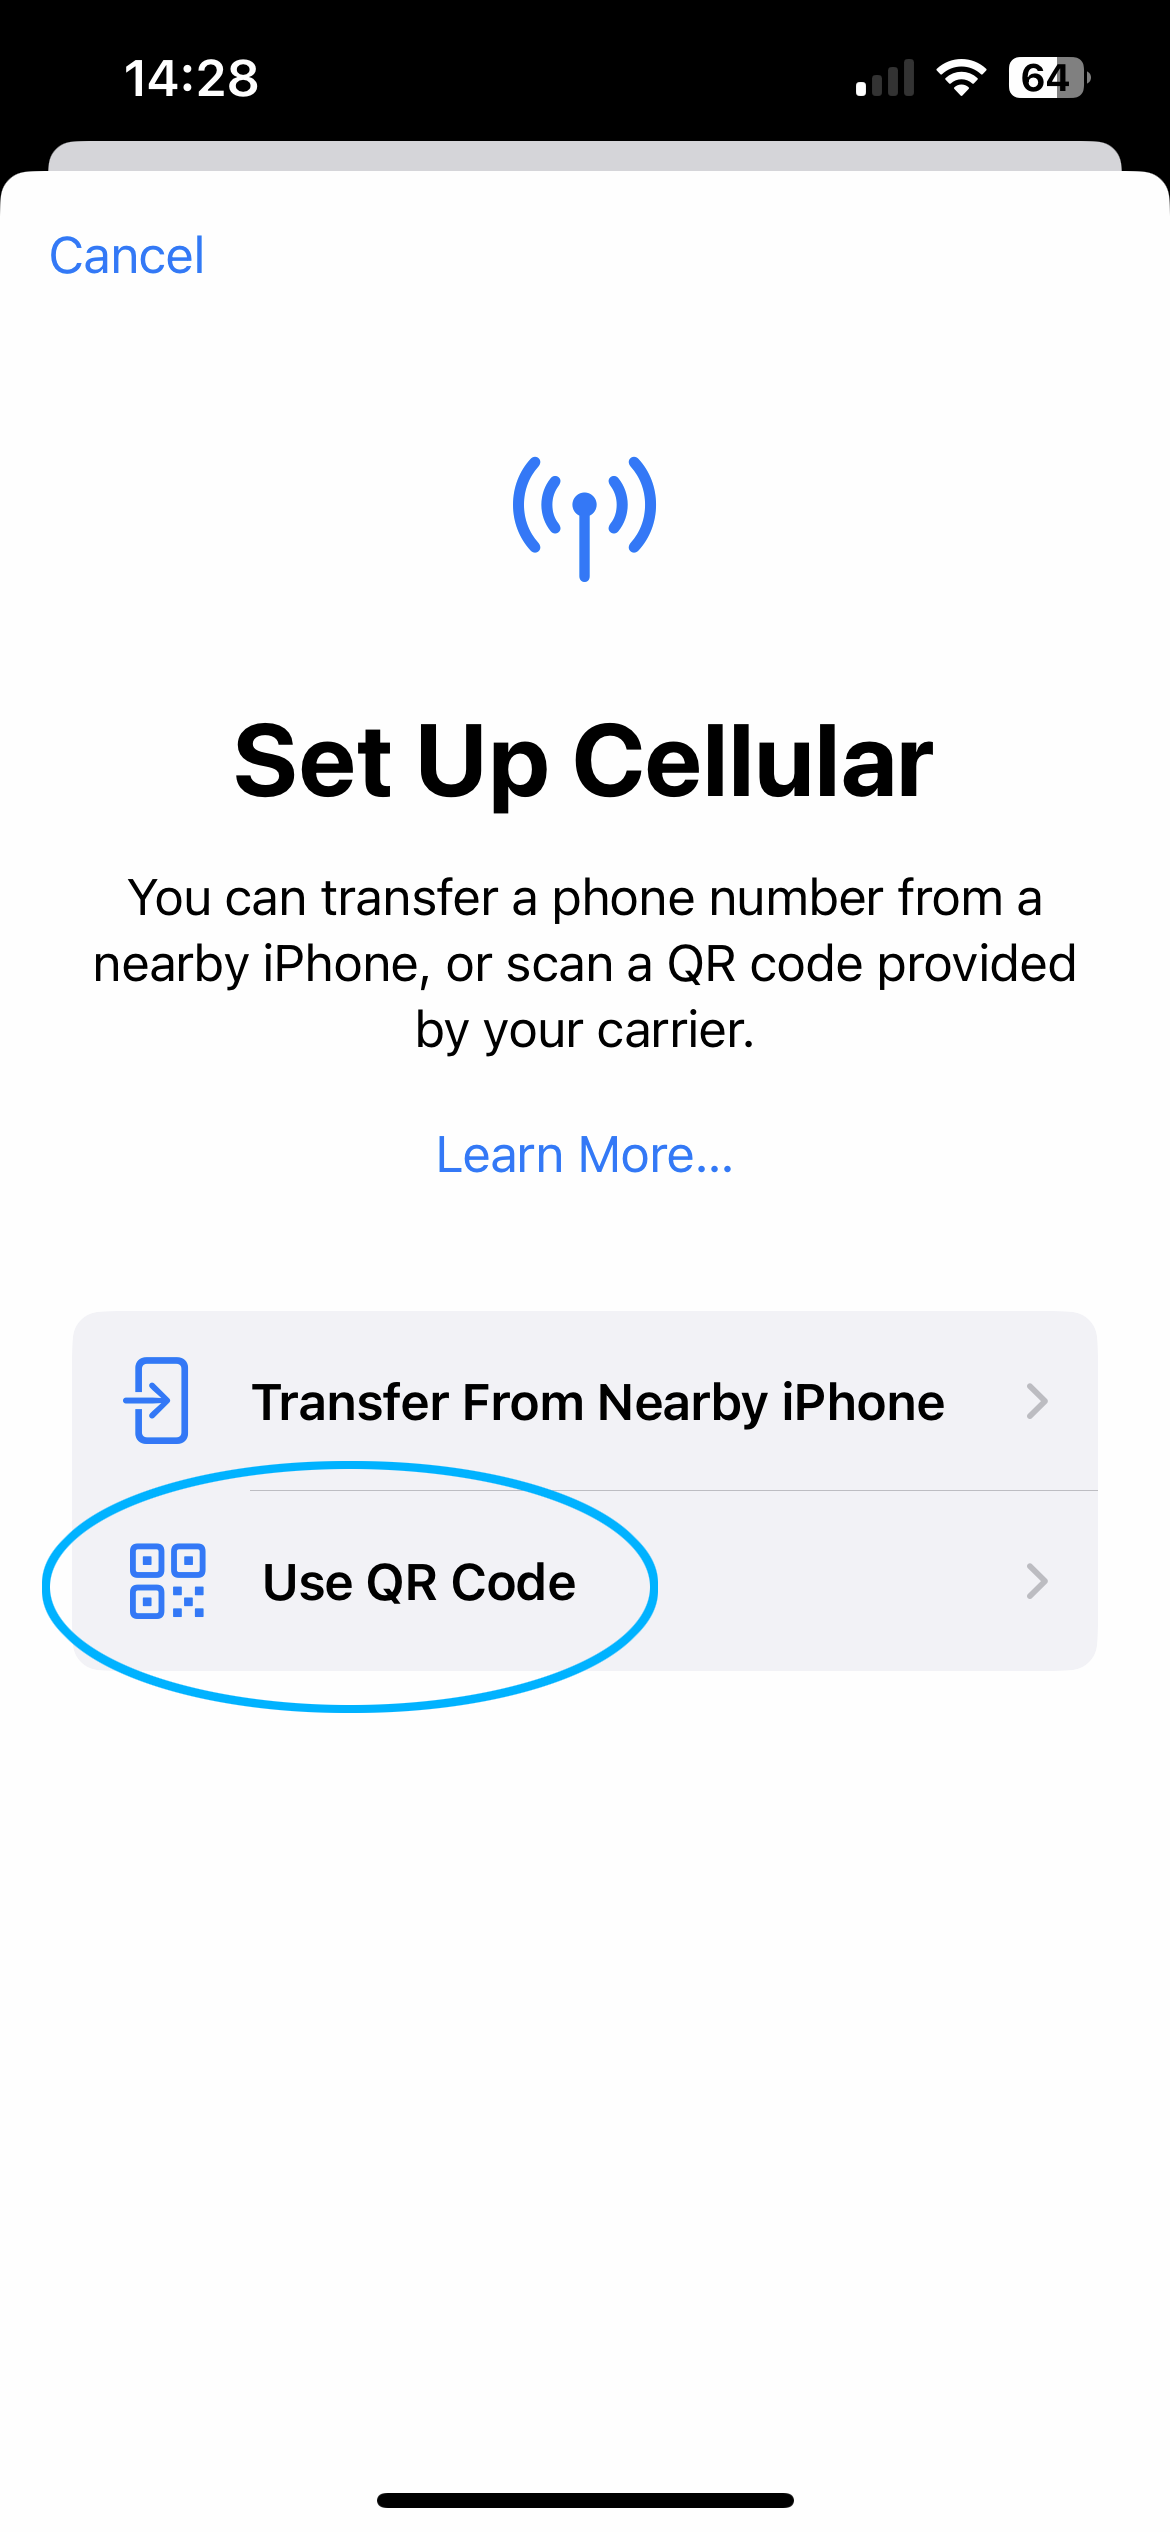
1. Add eSIM
In this step, you'll add a new secondary data plan using the QR code.
If your Camera can't scan the QR code, try "Activate an eSIM with a Manual Activation Code."
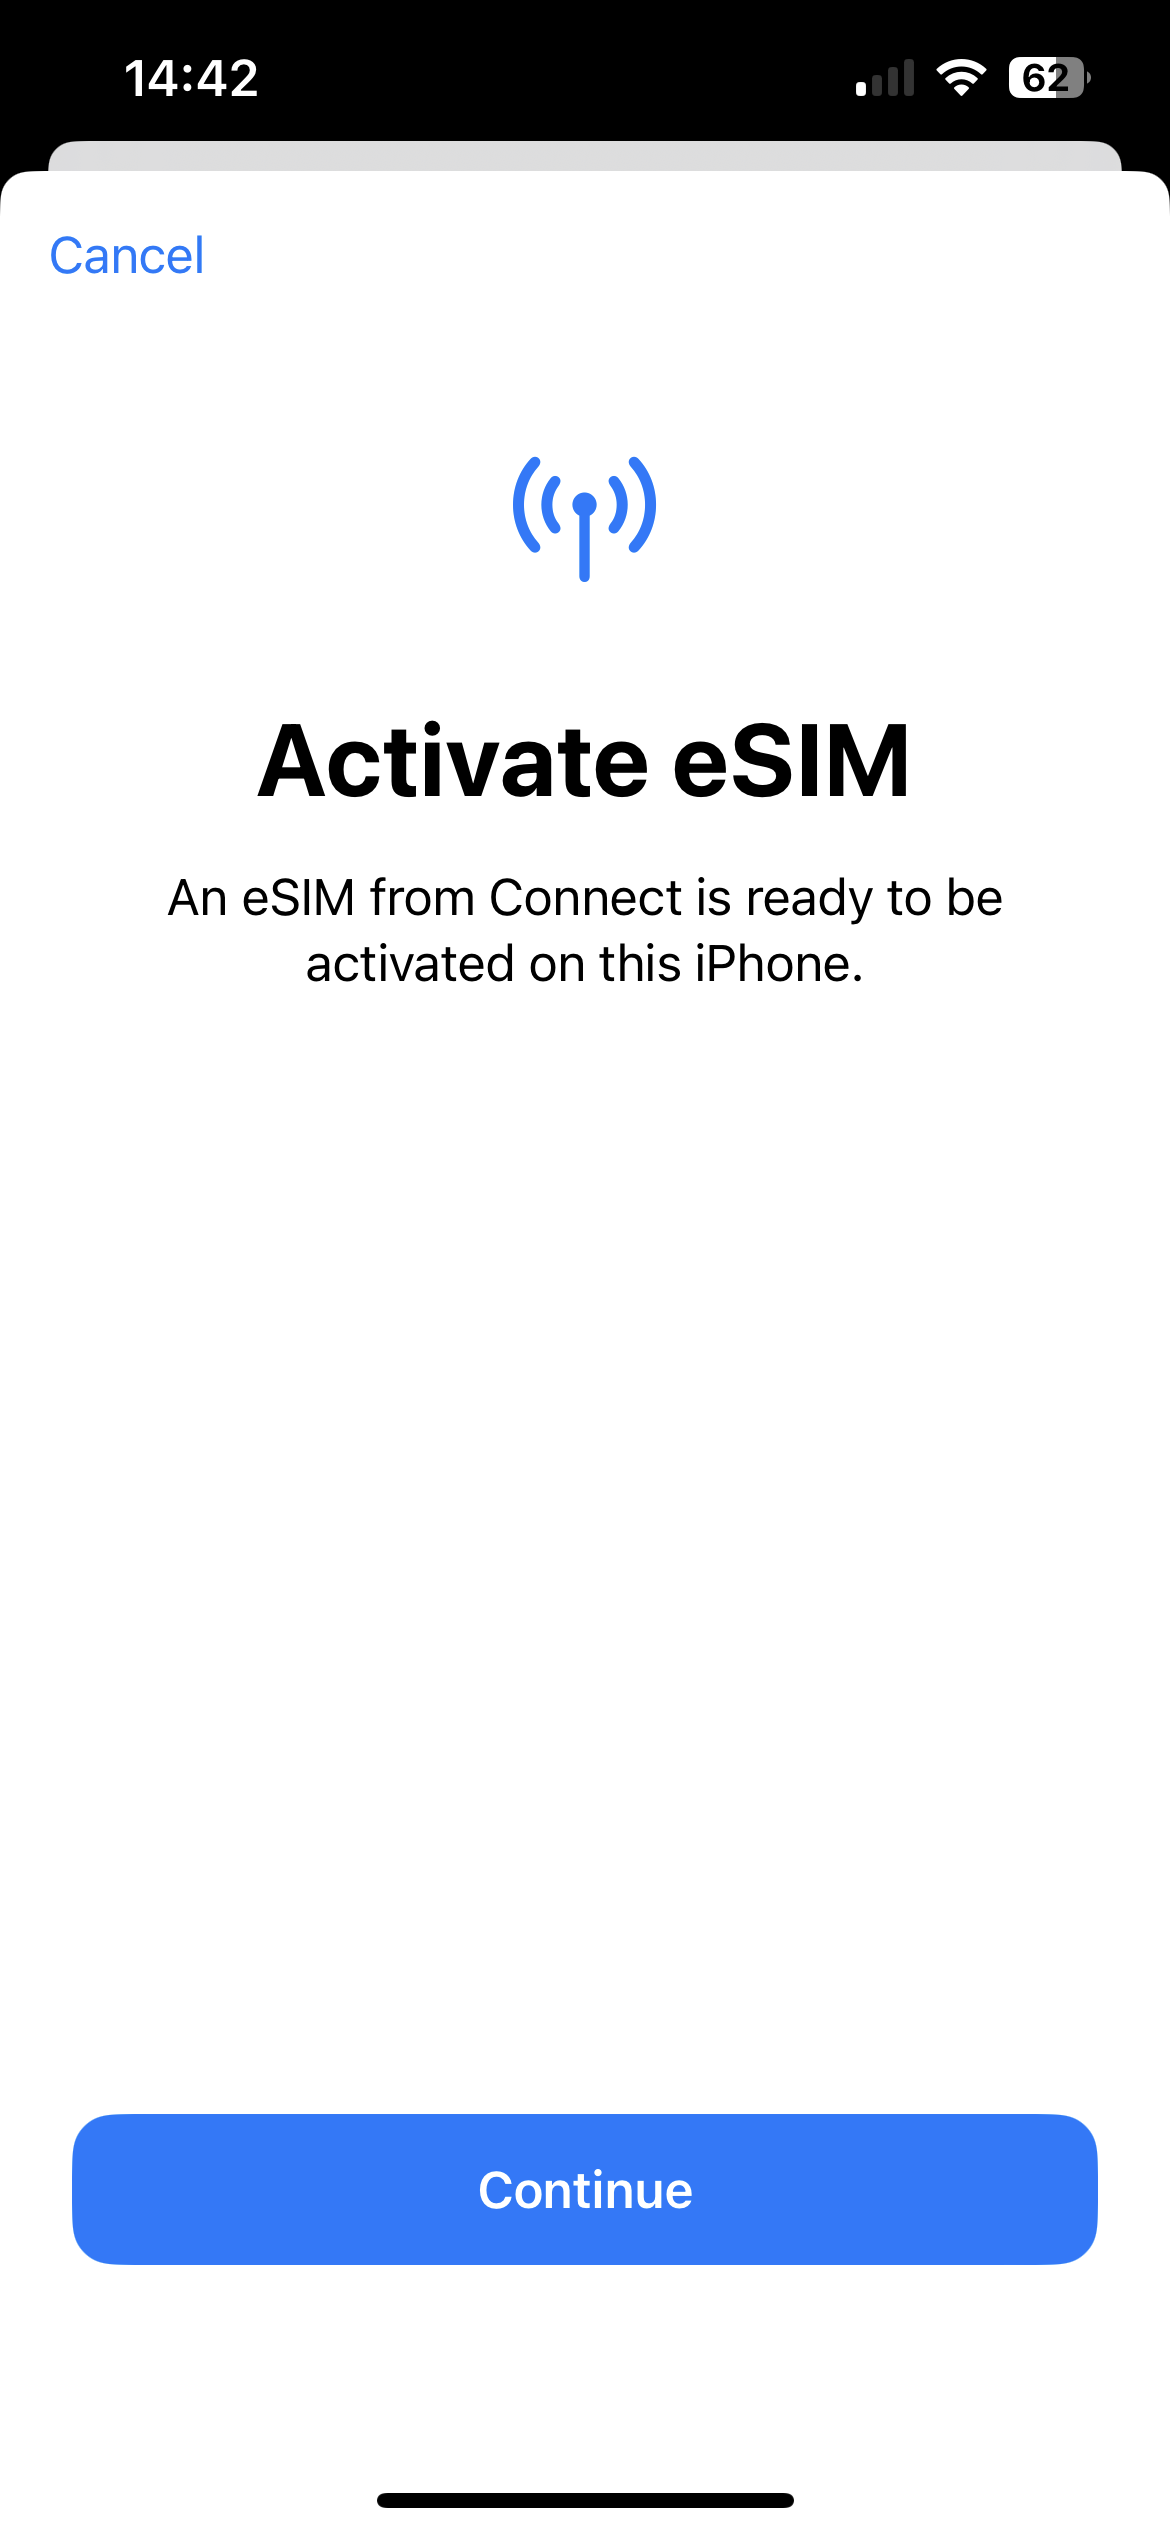
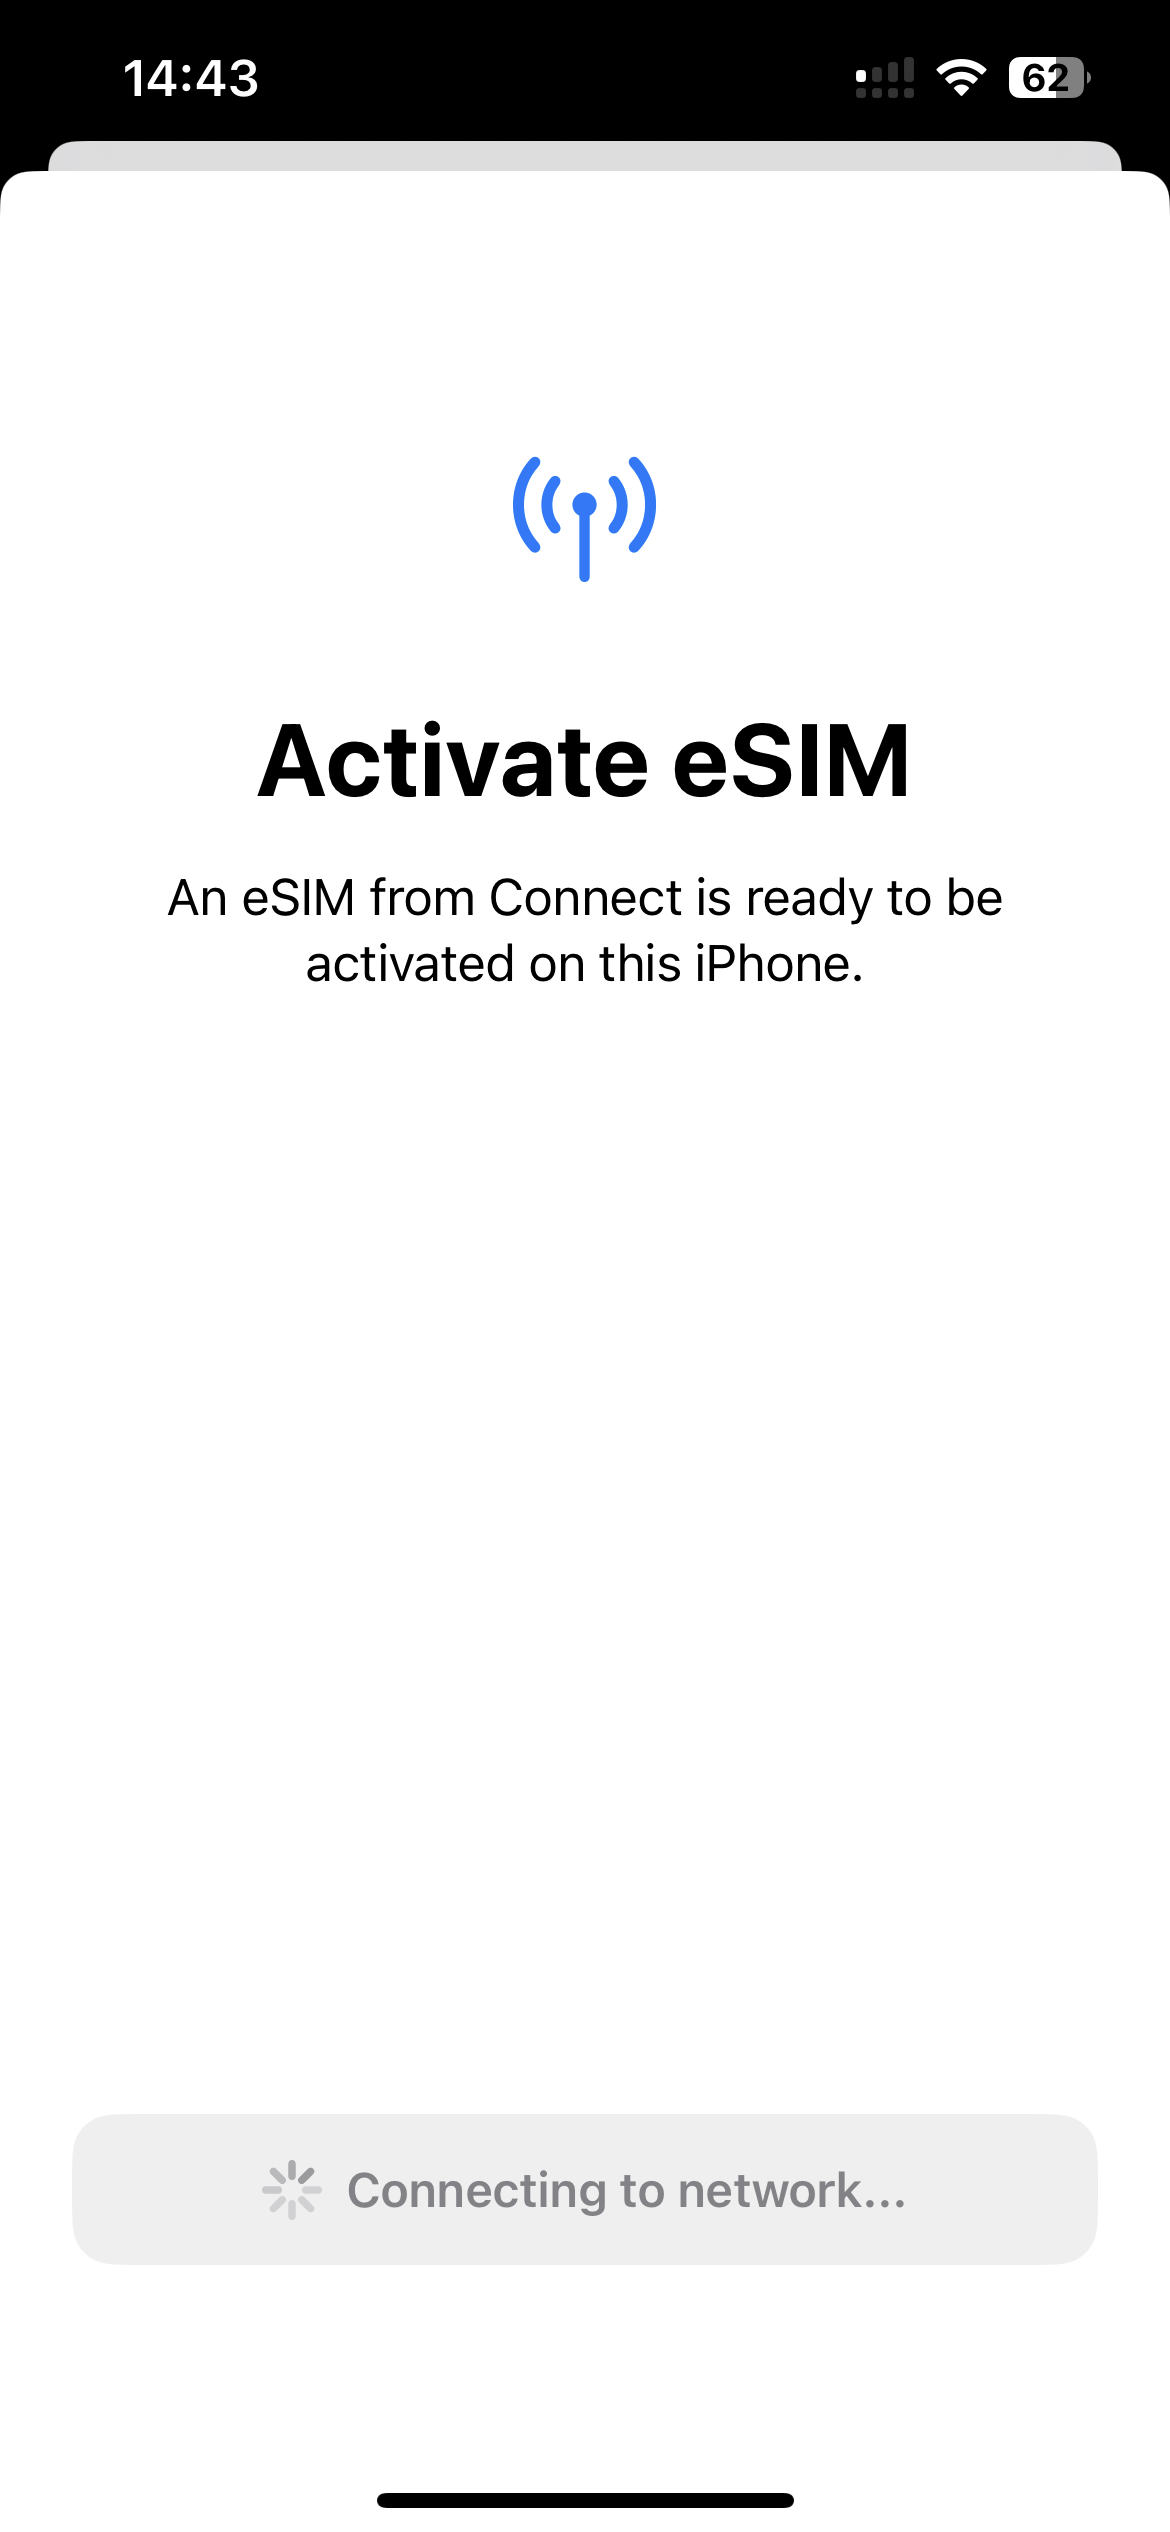
2. Activate eSIM
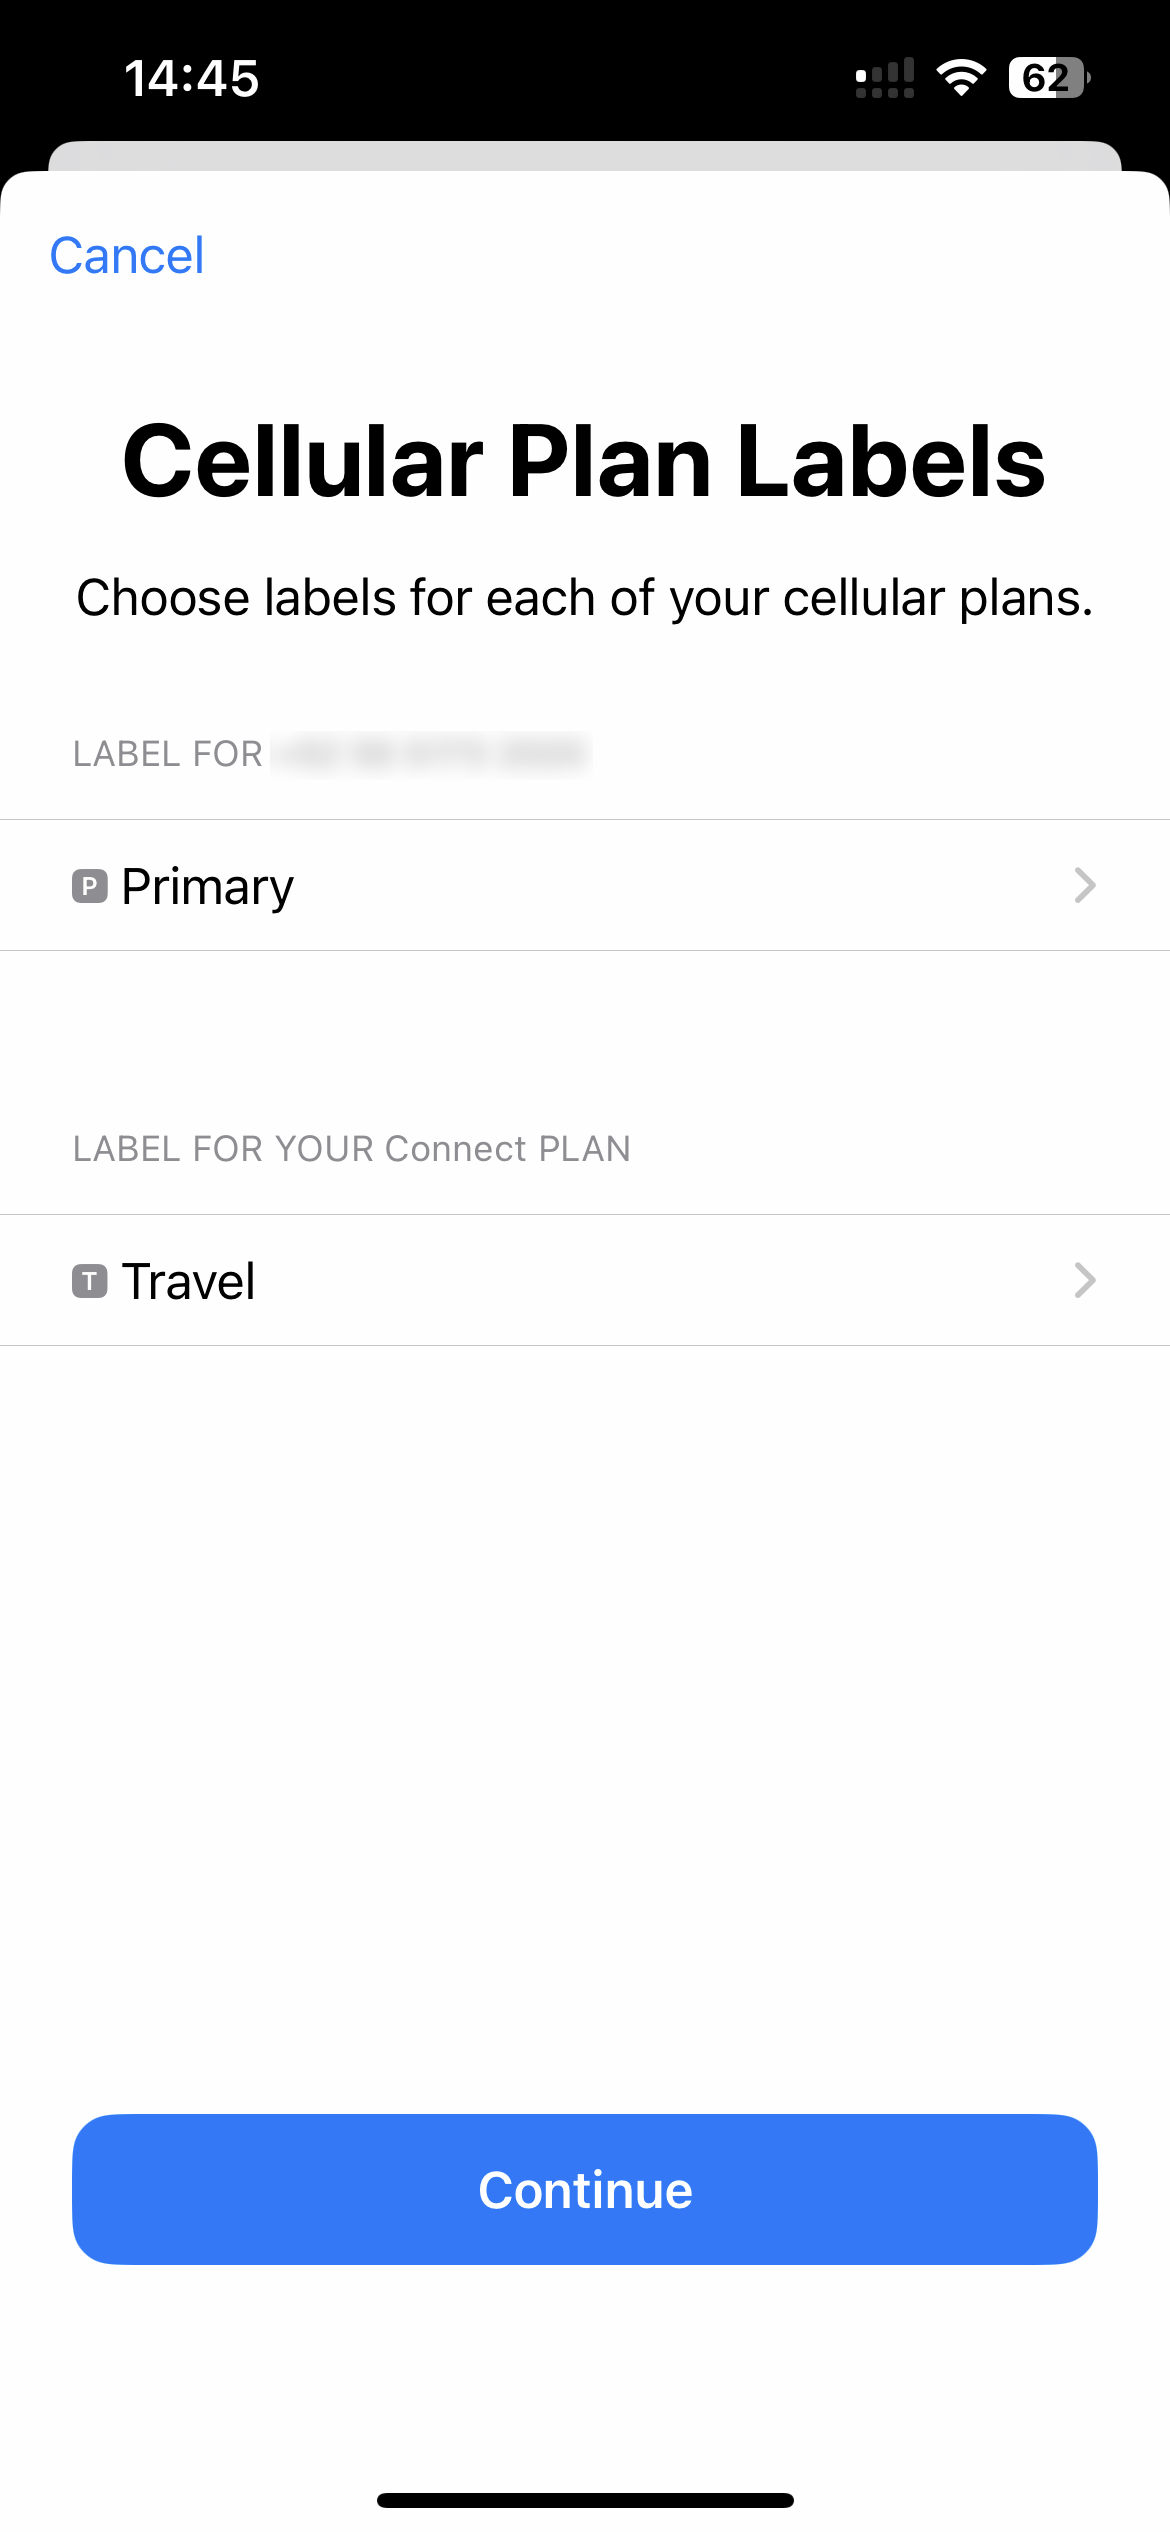
Here, you can give the eSIM a name on your phone. You can call it esimNB eSIM" or the name of the country you're visiting.
3. Choose Default Lines
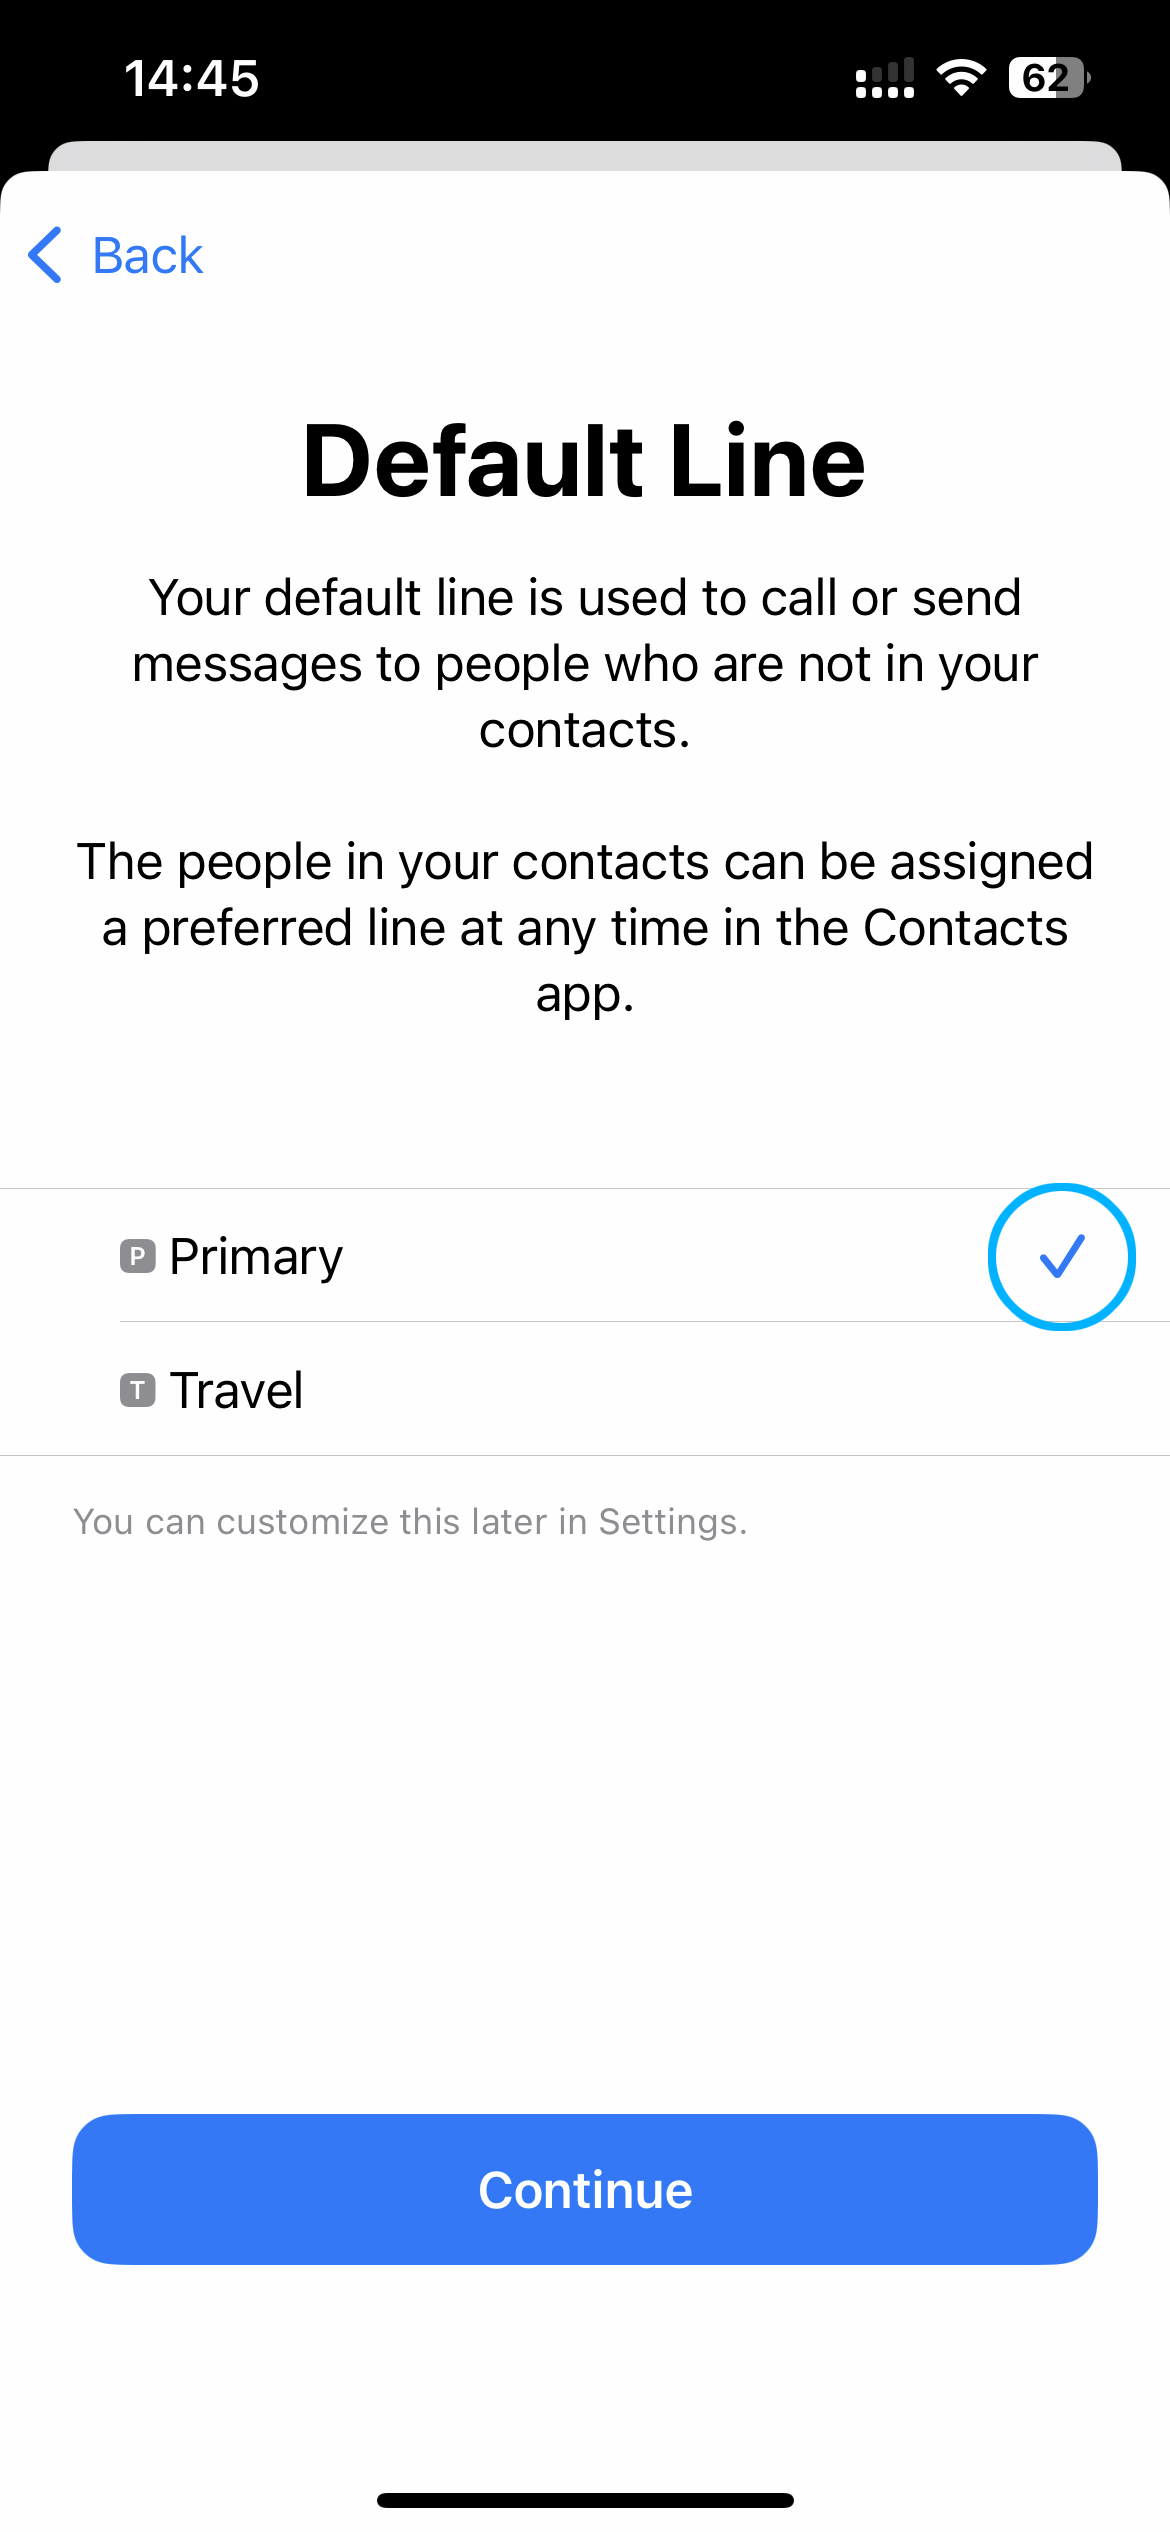
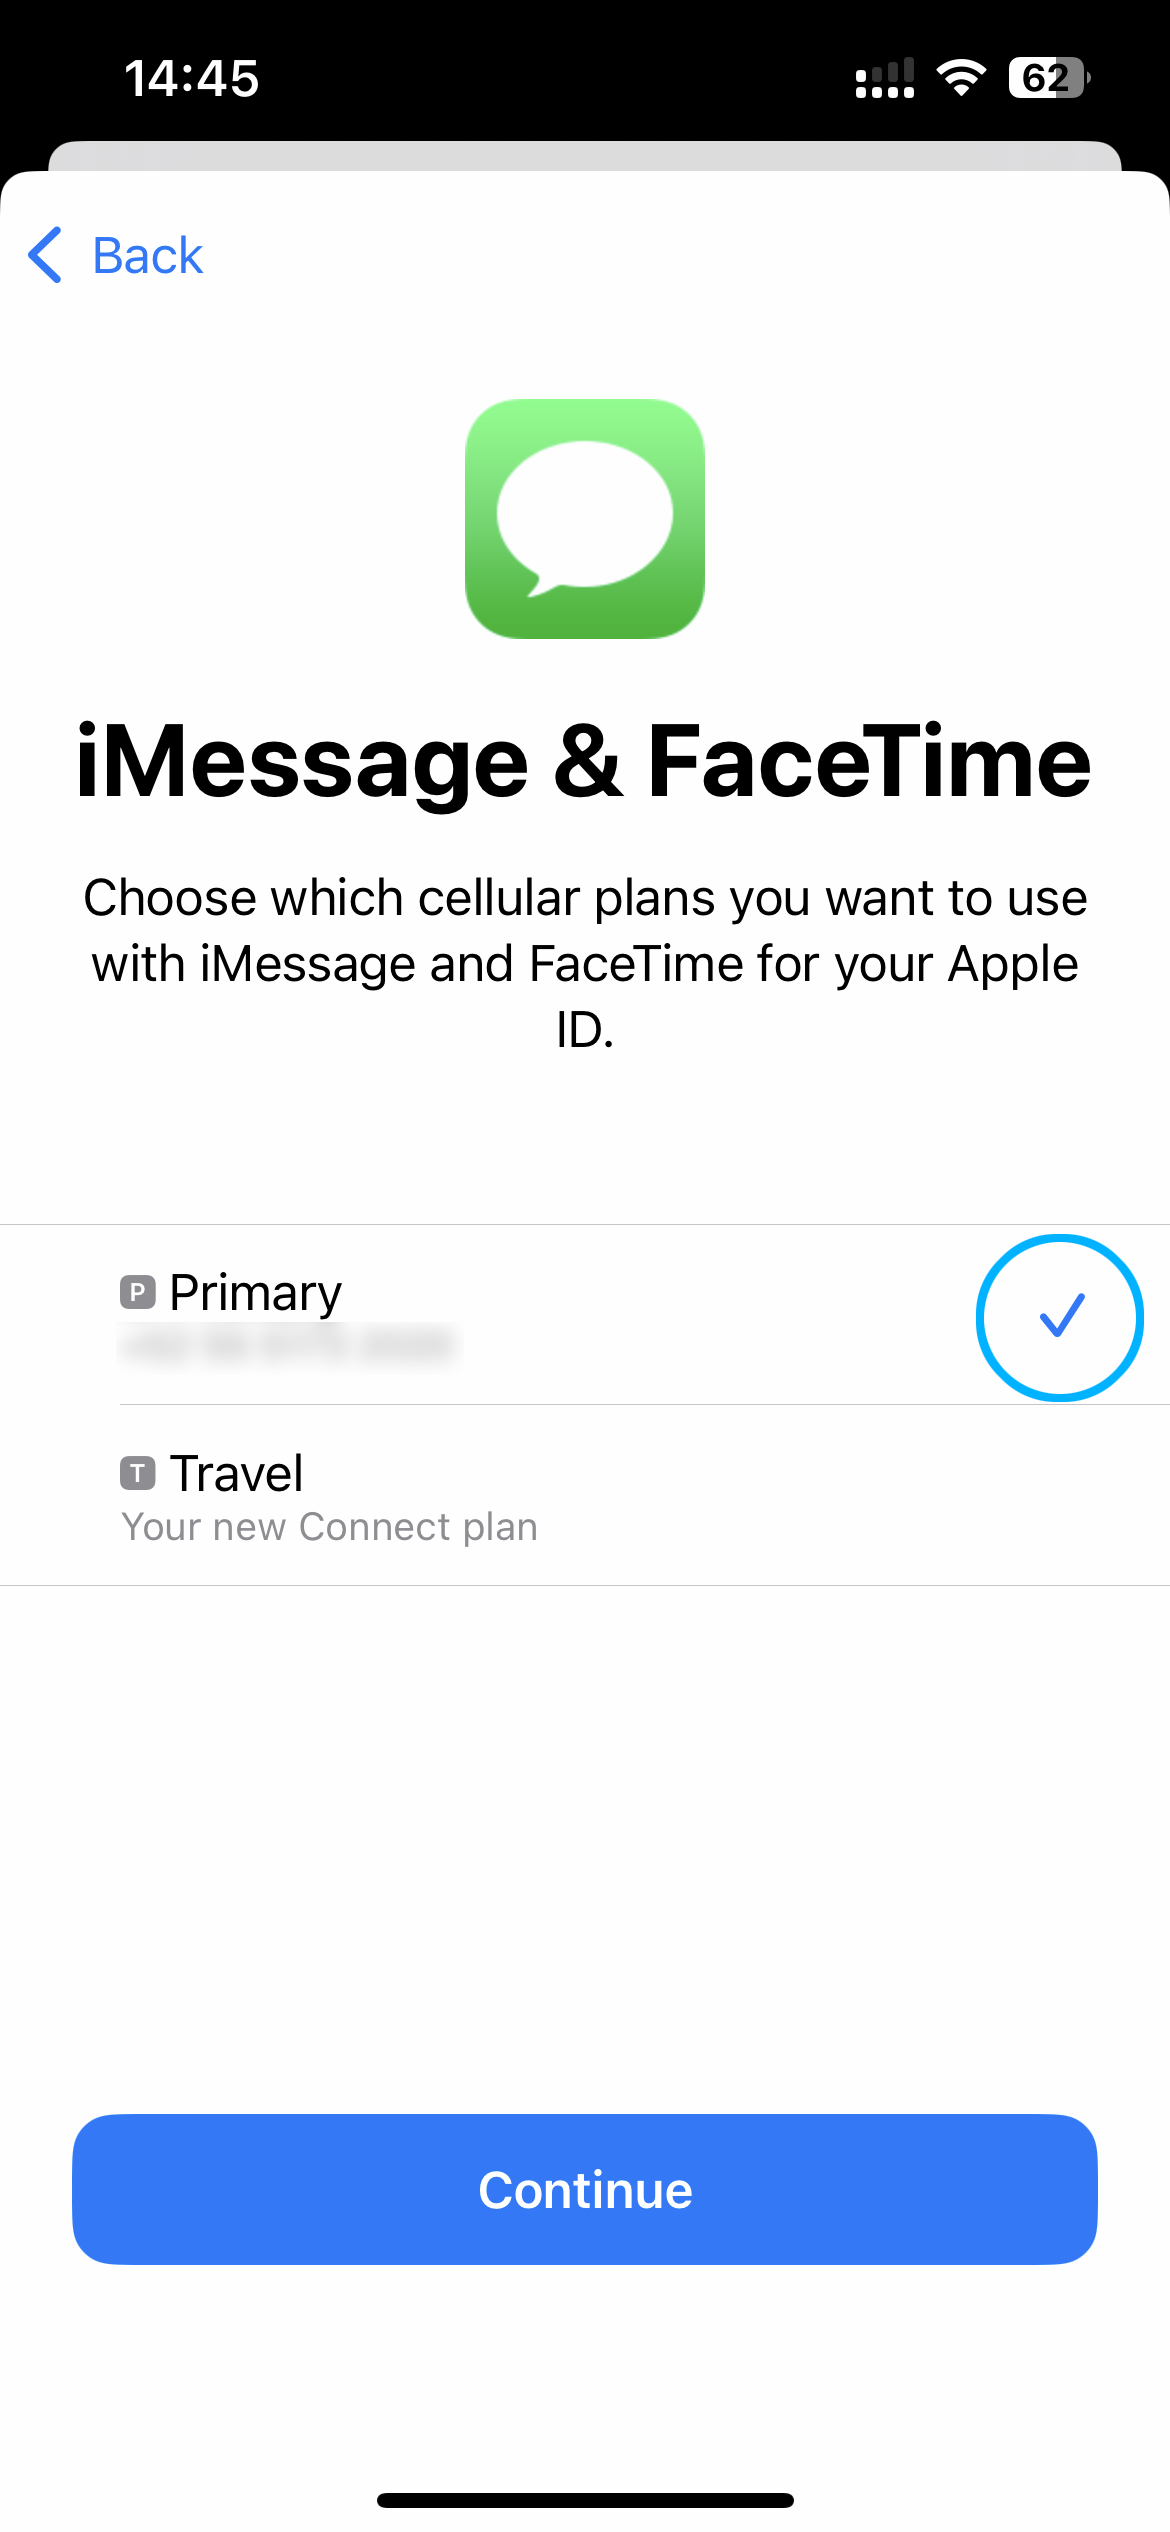
Next, choose which plan to use for Voice/SMS, iMessage, and Mobile Data.
Select Primary for Voice/SMS and iMessage, and use the esimNB eSIM for Mobile Data only.
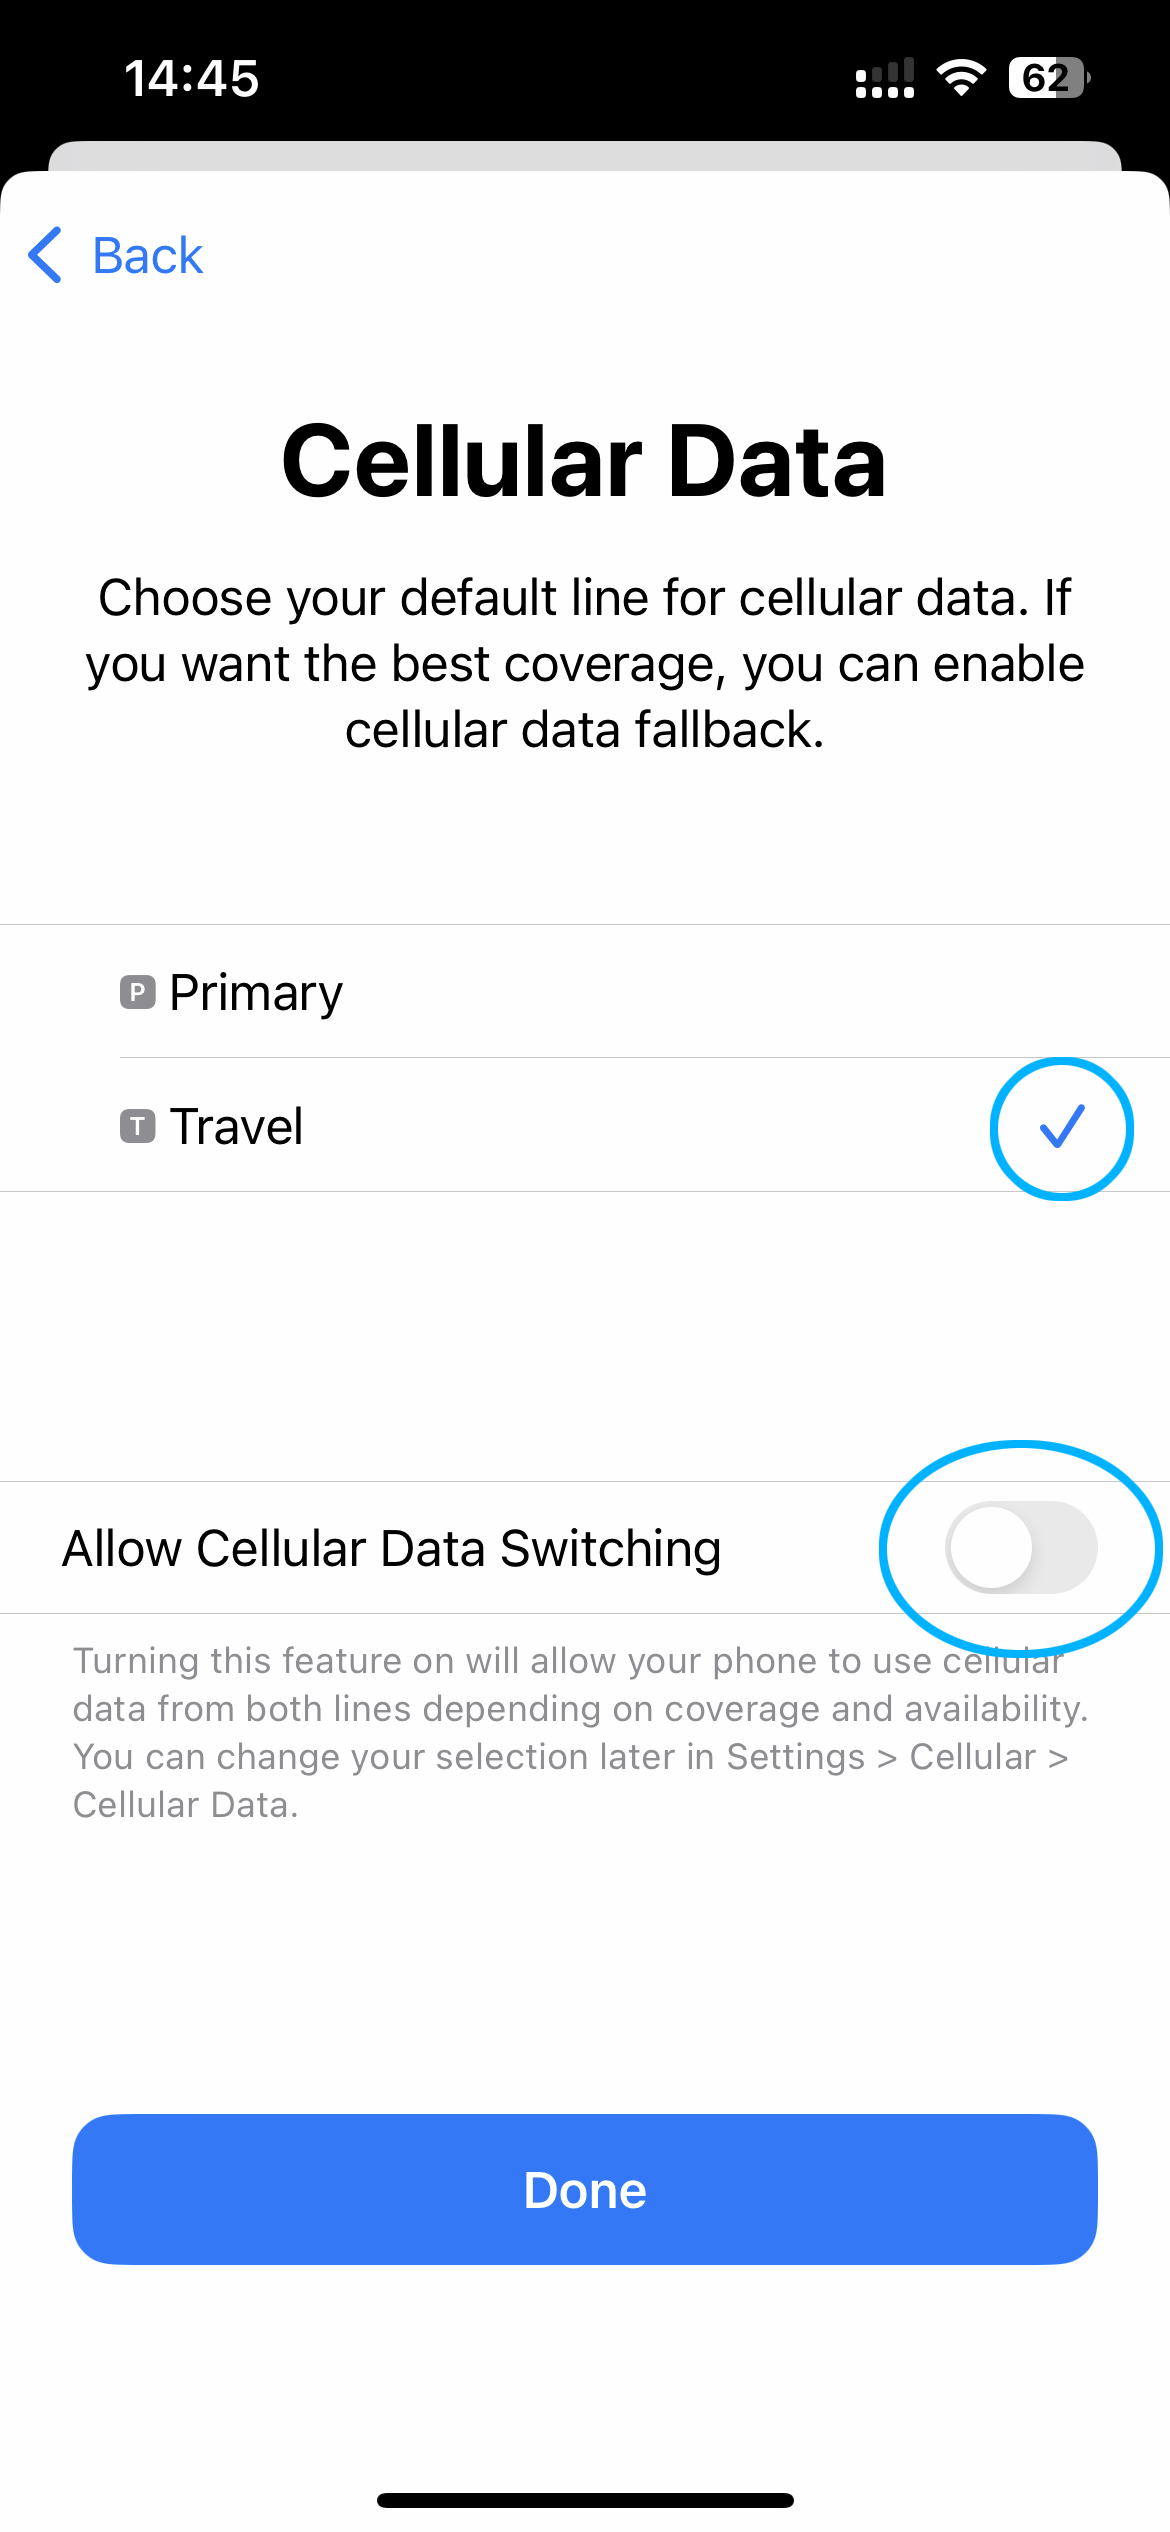
4. Enable Data Roaming
The eSIM is now installed! You'll see the new plan in your Settings with the label you assigned.
The final step is to ensure Data Roaming is turned ON for the eSIM (you can keep Data Roaming OFF on your Primary line).
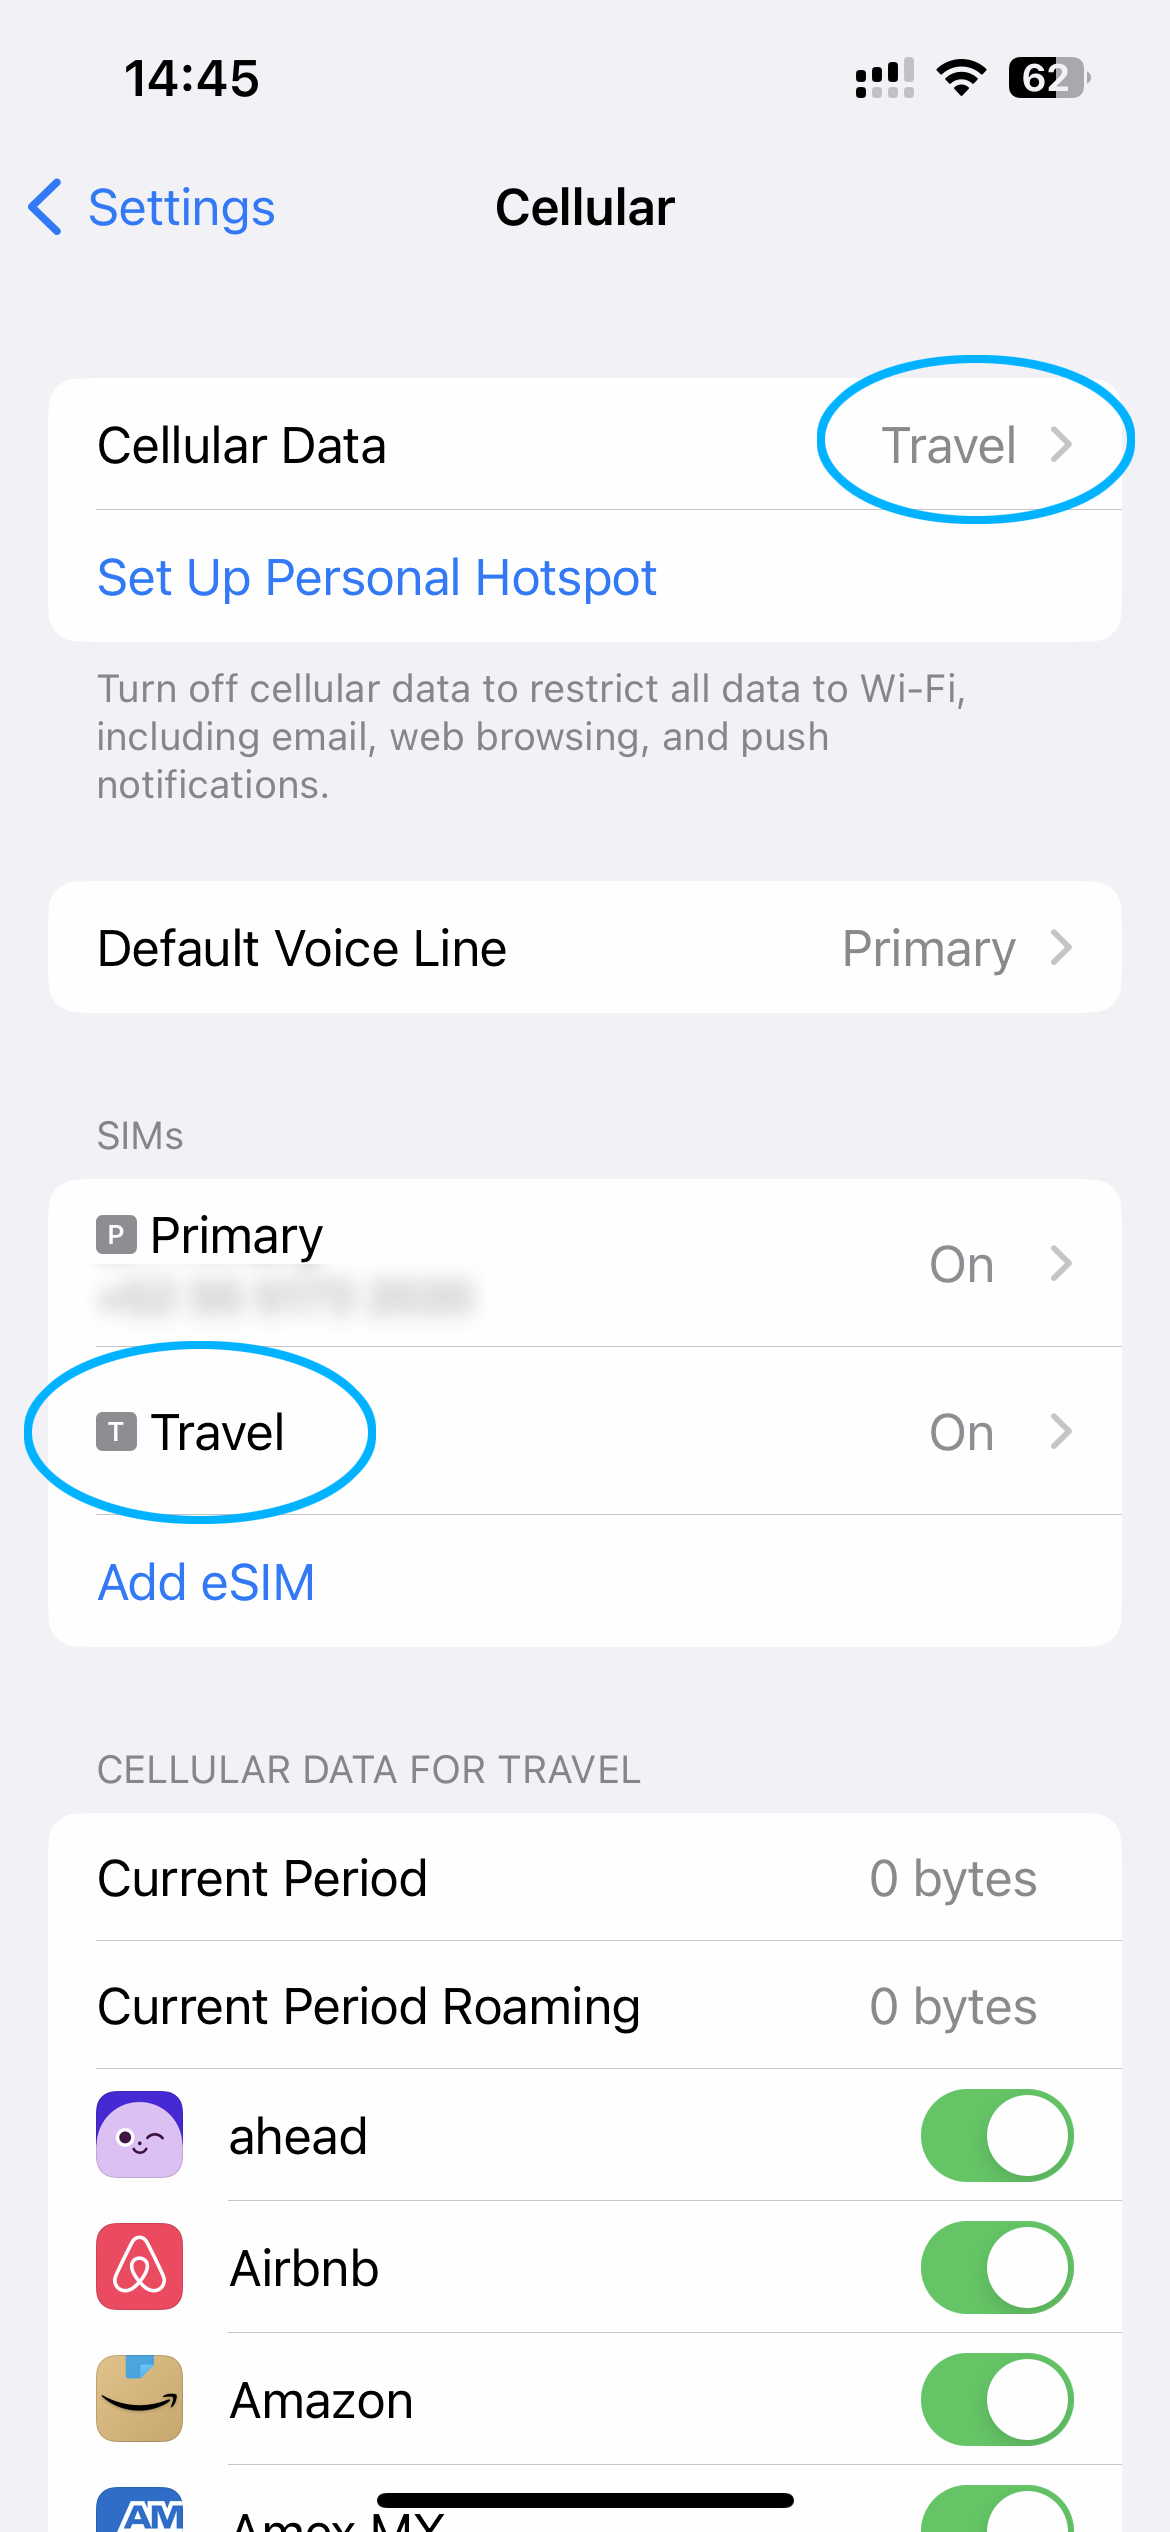

On the same screen, you can choose Data Mode and select Low Data Mode. This helps save data by reducing background usage when the eSIM is active.
Connecting to the Internet
After you activate your eSIM, your device will start searching for a signal right away. In most cases, it connects within seconds, and you'll see 5G or 4G/LTE in your status bar. This means your data is active and you're ready to go.
In some situations, it may take a little longer—up to 15 minutes—for the connection to come through. This is normal and can be due to network carriers or local environmental conditions. Thanks for your patience.