Japan SIM Card Guide: What I Always Do Before (and After) Landing
Key Takeaways
- Physical SIM cards suit last-minute planners. eSIM suits anyone who prefers to have everything ready before landing. Full comparison guide here.
- For eSIM, esimNB is the option I recommend. Set it up at home, and your phone has signal the moment you land.
- For physical SIM, Sakura Mobile is the friendliest option for first-time visitors. IIJmio is a strong choice for most other travelers.
- Buy online before your trip. Airport counters cost more and often have long lines. Convenience stores are a decent backup, not a first choice.
- Android users need to set APN details manually on most physical SIM cards. Check the packaging and save the settings correctly.
- For eSIM, activate at home on WiFi. Do not delete the eSIM after installation as the QR code only works once.
- If you use two SIMs, set your Japanese SIM as the default data SIM and turn off roaming on your home SIM.
- 10 GB covers most city-focused 7-day trips comfortably. Go up to 15 GB if your trip includes rural areas or heavy social media use.
My first trip to Japan did not go the way I planned. I landed at Narita Airport after a long flight, walked up to the SIM card counter, and stared at a wall of options I knew nothing about. I picked one that looked right. It was not right. The data ran out in three days, the coverage in Kyoto was weak, and I spent half a temple visit searching for a convenience store WiFi just to load Google Maps.
In Japan, your phone is your map, your translator, your train schedule, and your backup plan. Without a working connection, even a well-planned trip starts to fall apart at the edges.
I have been to Japan several times since then. Each time, I figure out a little more about what works and what is a waste of money.
Here is what the blog cover: which type of SIM card makes sense for your trip, where to buy one, how much data you actually need, and how to get everything set up before your plane even lands.
Do You Actually Need a SIM Card in Japan?
Short answer: yes.
Long answer: It depends, for solo traveler or short trip, travel eSIM is better.
Japan has free WiFi in many places, airports, train stations, and convenience stores. It sounds like enough. In practice, it covers maybe 20% of the moments when you actually need your phone. The second you step outside a major station, the signal disappears. Temples, side streets, hiking trails, rural towns, and even some subway platforms have no WiFi at all. I tested this on my first trip and spent a lot of time standing still, waiting for a map to load.
Offline maps help, but only up to a point. Google Maps lets you download areas in advance, but offline mode does not show real-time train delays, updated business hours, or live traffic. Japan's train system is excellent, but it is also complicated. One cancelled line or one missed transfer and you need live data to figure out what to do next.
Some travelers use pocket WiFi instead of a SIM card. A pocket WiFi is a small device that creates a personal hotspot. It works, but it comes with real problems. You need to carry an extra device and keep it charged. If you share it with travel partners, the speed drops for everyone. You also need to return it before you leave Japan, which adds a task to your last day when you are already rushing to the airport.
Physical SIM vs eSIM for Japan
When I first started traveling to Japan, I always bought a physical SIM card. It felt safe and familiar. More recently, I switched to eSIM, and I have not looked back. Both options work well, but they suit different kinds of travelers. Here is how they compare.
A physical SIM card is a small chip you put into your phone. You can buy one at the airport, at convenience stores, or online before your trip. The biggest advantage is flexibility. If you did not plan ahead, you can pick one up the moment you land. No app, no QR code, no setup at home. You just swap the chip and follow a few steps on your phone.
An eSIM is built into your phone and works without any physical chip. You buy a plan online, scan a QR code, and the SIM activates on your device. The best part is timing. You can set everything up days before your flight and have a working connection the moment your plane touches down in Japan. For people who travel to Japan often, this is a huge convenience.
I switched from physical SIM to eSIM after my third trip. The reason was simple. I can't be bothered with airport queues. I’d much rather just handle everything myself and skip the small talk.
With eSIM, I bought the plan from my couch two days before departure. By the time I cleared customs at Haneda, my phone already had signal.
The one thing to check before going eSIM: not every phone supports it. Most phones made after 2020 do, but budget Android phones and older iPhones may not. Check your phone settings before you buy.
Here is a quick comparison to help you decide:
The SIM Cards I Recommend
For Physical SIM: IIJmio
IIJmio is a well-known option among travelers who prefer a physical SIM. You can order it online before your trip and have it delivered to your home, or pick it up at certain locations in Japan. The network quality is strong across major cities, and the plans are straightforward.
It works well for travelers who want a traditional SIM card experience without paying airport prices. The downside is that setup takes a few more steps than some competitors, including manual APN settings on some Android phones.
For Physical SIM: Sakura Mobile
Sakura Mobile targets tourists directly, which means their customer support are available in English.
Plans start at a reasonable price for short trips, and they offer both data-only and voice options. I recommend this one to first-time visitors who want something simple and well-supported.
For eSIM: esimNB
This is my current go-to for Japan trips. esimNB offers Japan data plans that you buy and activate entirely online. The setup takes about five minutes. You scan a QR code, follow the prompts, and your eSIM is ready before you leave home.
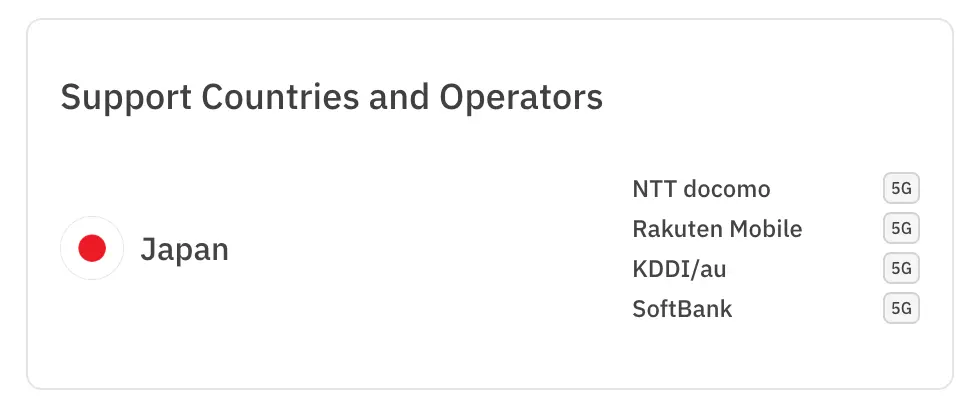
What I like most is the reliability. esimNB Japan eSIM support Docomo, SoftBank, KDDI (au), and Rakuten Mobile.
The signal held up in places where I expected it to drop. Coverage runs on Japan's major networks, so you get solid 4G and 5G in cities and decent signal in smaller towns.
The price is competitive, and there are plans for different trip lengths. A 7-day plan covers most short visits. If you tend to use a lot of data, the higher-tier plans are worth the small extra cost.
The only real requirement is an eSIM-compatible phone. If your phone supports it, esimNB is the option I recommend without hesitation.
Quick Comparison Table
Where to Buy a Japan SIM Card
Knowing which SIM card to buy is only half the job. Knowing where to get it saves you time, money, and stress on arrival day. I have tried all three main options. Here is what each one is actually like.
At the Airport
Japan's major international airports all sell SIM cards, and the counters are easy to find. At Narita, the main SIM card shops sit inside the arrivals hall, right after you clear customs. Haneda and Kansai Airport have similar setups.
You will find brands like IIJmio, Sakura Mobile, and a few others. Staff at most counters speak basic English, which helps.
The problem is the line. If you land during a busy period, which at Narita means most mornings and weekend afternoons, the wait can stretch to 30 or 40 minutes. After a long flight, that is the last thing you want. Prices at airport counters also run slightly higher than buying online. You pay for the convenience.
If the airport is your only option, go for it. But it should not be your first choice if you have time to plan ahead.
At Convenience Stores
This surprised me on my first trip. Japan's convenience stores actually sell SIM cards. 7-Eleven, FamilyMart, and Lawson all carry them in major cities. You will find them near the register or in a small display near the entrance.
The brands available vary by store, but IIJmio and a few prepaid options show up regularly. Prices are fair, usually better than the airport. The catch is that not every store carries SIM cards. Smaller branches in rural areas often do not stock them. Your best bet is a large convenience store near a train station in Tokyo, Osaka, or Kyoto.
Convenience store SIM cards are a good backup option. If you land, skip the airport counter, and realize later that you need a physical SIM, a convenience store in the city will usually have what you need.
Online Before Your Trip
This is what I do now, and what I recommend to most travelers. Buying online gives you the best price, the most options.
For eSIM, I use esimNB. I buy the plan a day or two before my flight, activate it at home, and my phone is ready the moment I land.
For physical SIM, ordering through the brand's website and having it delivered to your home works well if you have enough lead time. Most services ship within a few days. Some also offer airport pickup, where you order online and collect a pre-packed SIM at a designated counter, skipping the main queue.
Setting Up Your Japan SIM Card
Setting Up a Physical SIM
Start by making sure your phone is unlocked. A locked phone only works with your home carrier's SIM cards. If you bought your phone directly from a carrier and never unlocked it, a Japanese SIM will not work. Contact your carrier before your trip and ask them to unlock it. Most carriers do this for free.
Once your phone is unlocked, swap out your home SIM for the Japanese one. Your phone should detect the new SIM within a minute. On most iPhones, data starts working automatically. On many Android phones, you need to enter the APN settings manually. APN stands for Access Point Name, and it tells your phone how to connect to the network. The correct APN details come printed on the SIM card packaging. Enter them exactly as written, including capital letters, then restart your phone.
A common mistake on Android is entering the APN details and then not saving them correctly. After you type everything in, make sure you select the new APN from the list before leaving the settings screen. If you skip that step, nothing changes.
Setting Up an eSIM
eSIM setup is simpler, but it requires a WiFi connection. Do not try to activate your eSIM on the plane or in an area without internet. Do it at home before your trip.
After you buy your plan, the provider will give you a QR code. On iPhone, go to Settings, then Mobile Data, then Add eSIM, and scan the code. On Android, the path varies slightly by brand, but you are looking for something like Settings, then Network, then Add eSIM.
Once installed, make sure Data Roaming is on!
If everything is correct, you can leave it sitting quietly on your phone until you land in Japan. It activates when your phone connects to a Japanese network.
One important note: most eSIM plans are one-time use. Once you scan the QR code and install it, that code stops working. Do not delete the eSIM from your phone thinking you can reinstall it later. If you accidentally delete it, you need to contact the provider for a new QR code.
When Your Phone Shows Signal But Has No Internet
This is the most common setup problem, and it happens on both physical SIM and eSIM. Your phone shows bars, which means it found the network, but web pages will not load.
The fix is almost always the APN settings. On iPhone, some SIM cards install the correct APN automatically through a configuration profile. If yours did not, check the packaging or the provider's website for the manual APN details. On Android, go into your mobile network settings and check that the correct APN is selected and active.
If the APN looks right and you still have no internet, restart your phone completely. This clears small connection errors that a simple toggle of airplane mode does not fix.
Using Two SIMs at Once
Many phones today support two SIMs at the same time, either two physical cards or one physical card and one eSIM. This is useful if you want to keep your home number active for calls and messages while using a Japanese SIM for data.
The key setting to check is which SIM handles mobile data. Go into your network settings and make sure your Japanese SIM is set as the default for data. Otherwise your phone may try to use your home SIM for internet, which means expensive roaming charges.
Also check that data roaming is turned off on your home SIM. This is a separate setting from which SIM is active. Leaving roaming on by accident is one of the most common ways travelers come home to a surprise phone bill.
How Much Data Do You Need in Japan?
Google Maps is your biggest data user on a Japan trip. Running navigation actively for one hour uses roughly 50–100 MB. If you use it for four to six hours a day across a week-long trip, that adds up to around 2–4 GB from maps alone.
Messaging apps like WhatsApp and iMessage use very little data. A full day of text messages and occasional voice notes costs less than 50 MB. Video calls are heavier. One 20-minute FaceTime call uses about 200–300 MB.
Translation apps like Google Translate use almost no data for text. The camera translation feature, where you point your phone at Japanese text and it translates in real time, uses slightly more but still stays under 100 MB per day for typical tourist use.
Instagram and social media are where data disappears fast. Scrolling through your feed for 30 minutes uses 150–300 MB depending on video content. If you post Stories or Reels with uploaded video, add another 100–200 MB per post.
Streaming video is the heaviest use of all. One hour of YouTube or Netflix at standard quality uses 500 MB to 1 GB. I recommend downloading shows to your device before your trip if you plan to watch anything on trains.
A Simple Rule
If you are not sure which category fits you, go one size up from what you think you need. The difference in price between a 10 GB plan and a 15 GB plan is usually just a few dollars. Running out of data in the middle of a trip costs you more in stress than that price difference is worth.
Most plans I recommend, including esimNB, offer options around 10–20 GB for a standard week-long visit. That range covers the majority of travelers without requiring any careful management of usage.
Final recommendation – esimNB
The esimNB Japan eSIM supports all four major mobile operators in Japan and offers 5G speeds, ensuring strong signal coverage and network stability while you travel in Japan.
After purchase, you can find a QR code on the website to scan and install the eSIM, and check its installation and usage status online. The esimNB also supports hotspot sharing and data top-up, making it very convenient for short trips to Japan.
New users enjoy a 10% discount. Enter the discount code: ESIMNB10 and apply the discount at checkout.
Researched with AI; manually verified by our editorial travel-tech team for accuracy.
RRuiwen
She is emotionally reserved, independent in daily life, and dreams of traveling the world. She possesses a quality rare among today's youth: courage. Her favorite anime character is Jolyne Cujoh.